万兴科技
How to configure Microsoft Azure SSO
──
Ver1.2|19thApril 2024
#一般|部门可见#(red!)


万兴科技Wondershare<br />How to configure Microsoft Azure SSO<br />──<br />Ver1.2|19thApril 2024<br /><br />#一般|部门可见#(red!)<br /> How to configure Microsoft Azure SSORevision HistoryCreate Enterprise AppSelect "Manage Microsoft Enterprise ID" in Azure portalChoose Enterprise applicationsOn the "All applications" page, click "New application"Enter application name and complete creationConfigure SAML InformationSelect Single sign-on, then choose SAMLModify Basic SAML ConfigurationEnter Entity ID and Reply URLEdit Attributes & ClaimsDownload CertificateFill in SAML Information in Excel TemplateFAQsMicrosoft Login AADST50105 ErrorThanks for choosing Wondershare!!!
How to configure Microsoft Azure SSO
Revision History
| Data | Comments | Version Number |
|---|---|---|
| 2024-04-15 | Create document | 1.1 |
| 2024-04-19 | Add FAQ | 1.2 |
Create Enterprise App
Select "Manage Microsoft Enterprise ID" in Azure portal
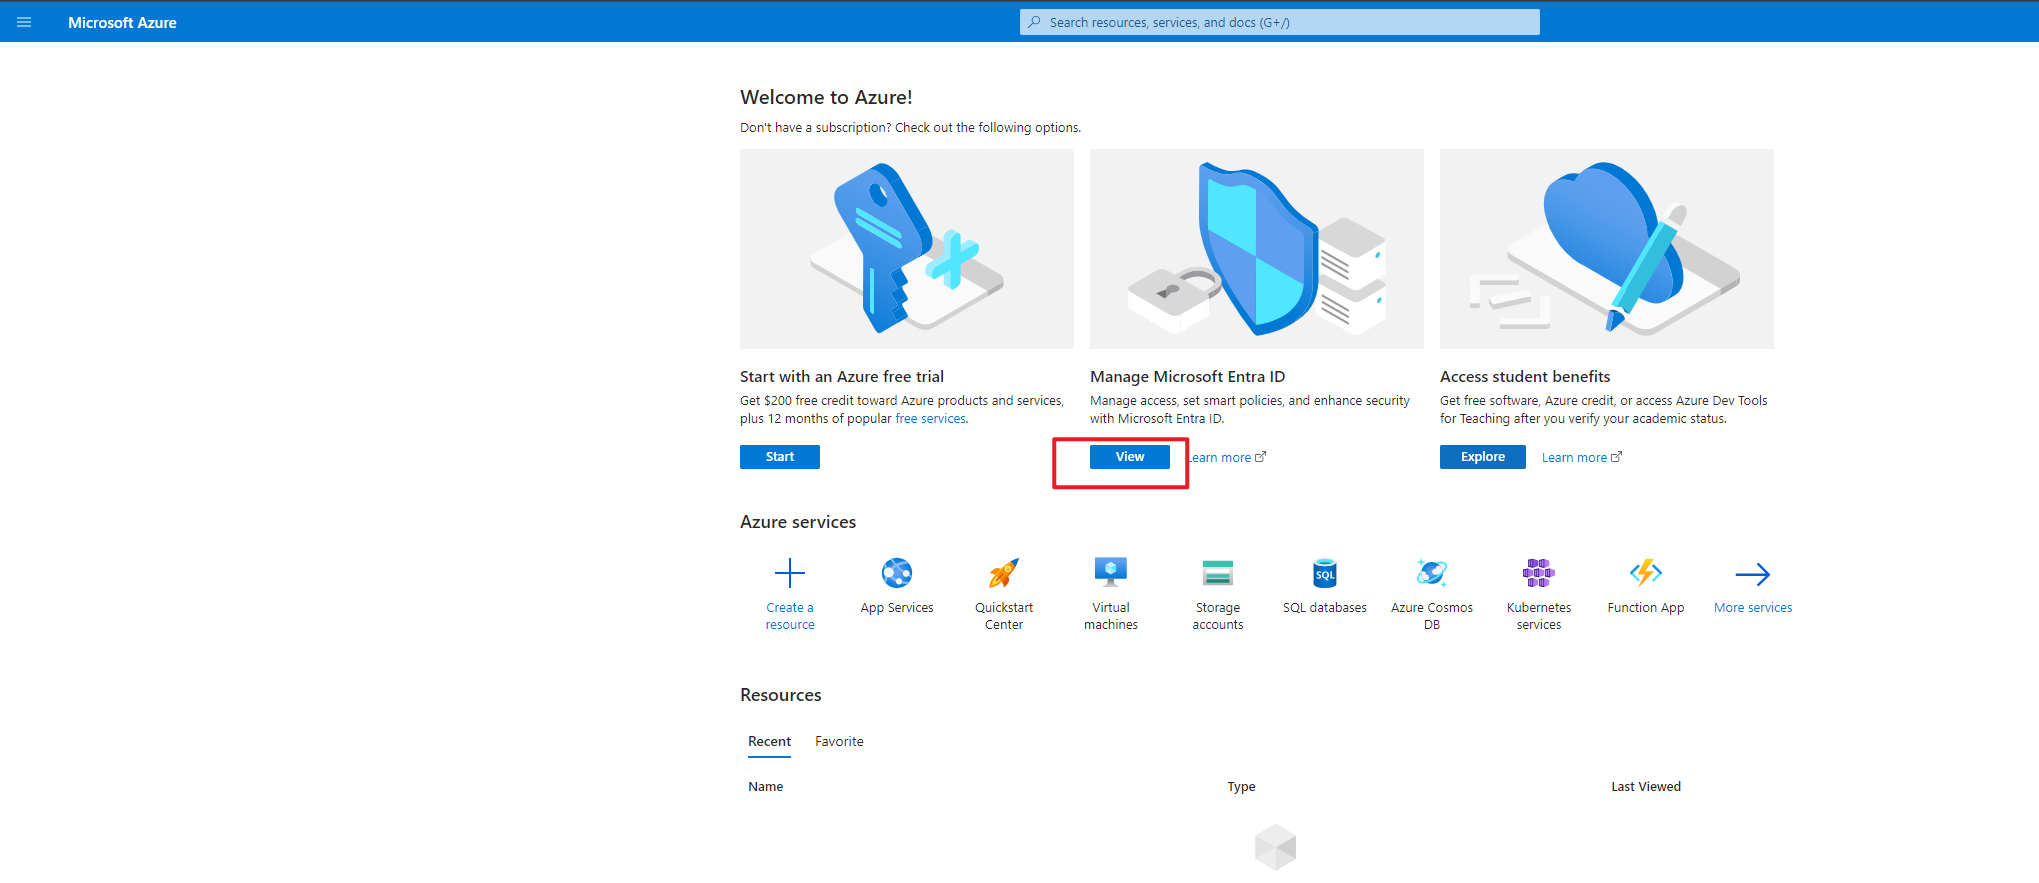
Choose Enterprise applications

On the "All applications" page, click "New application"

Enter application name and complete creation

Configure SAML Information
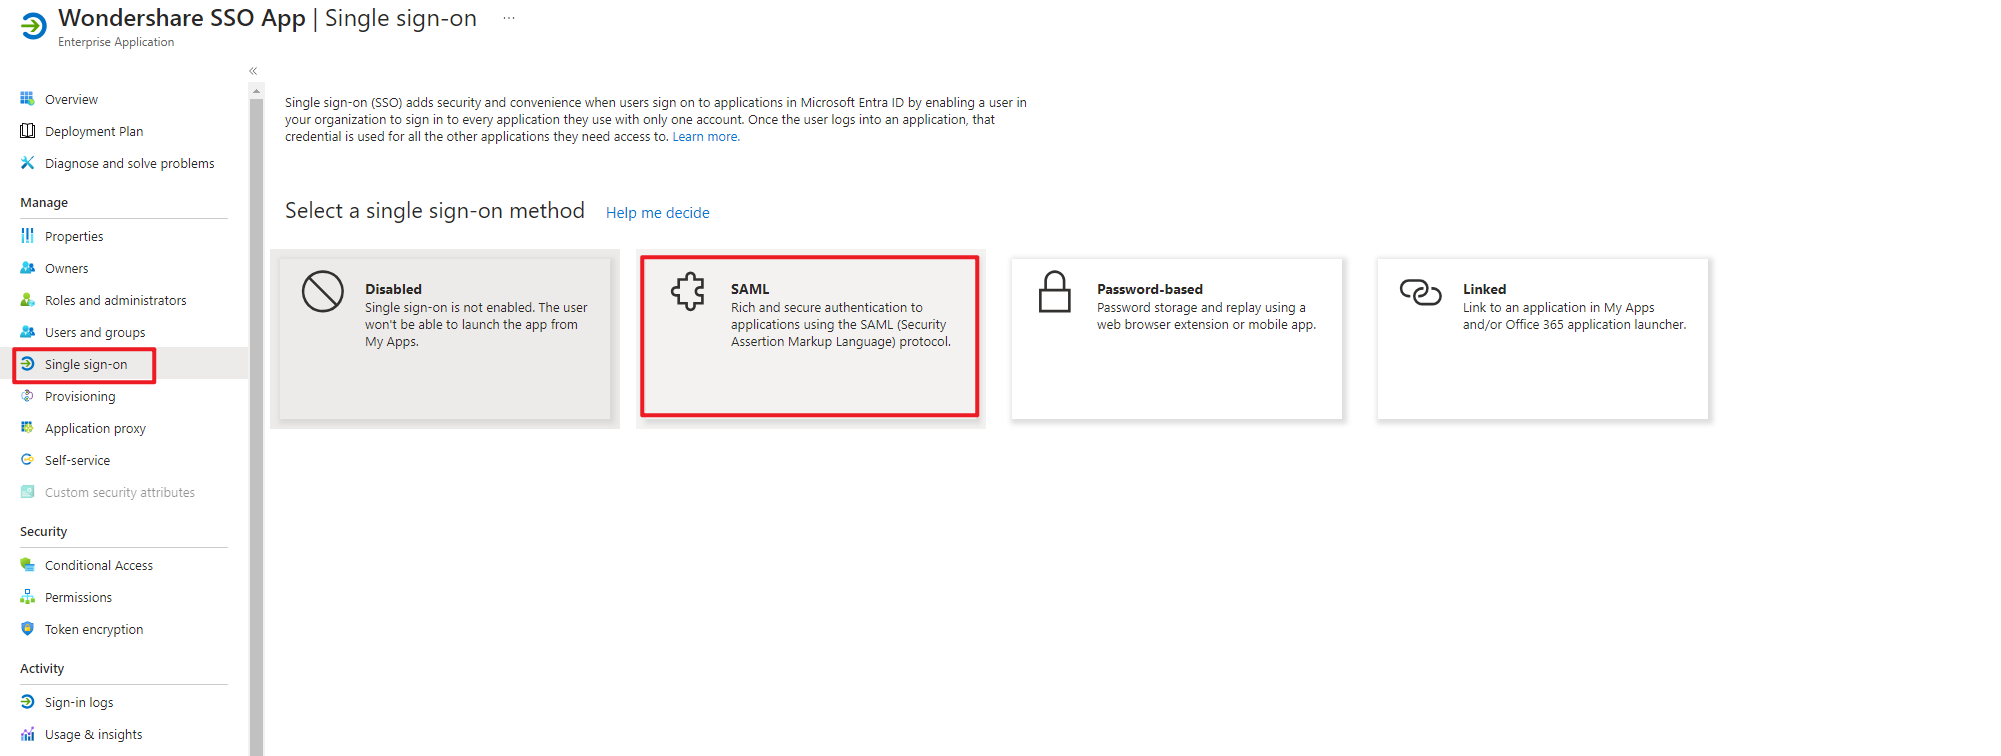
Select Single sign-on, then choose SAML

Modify Basic SAML Configuration
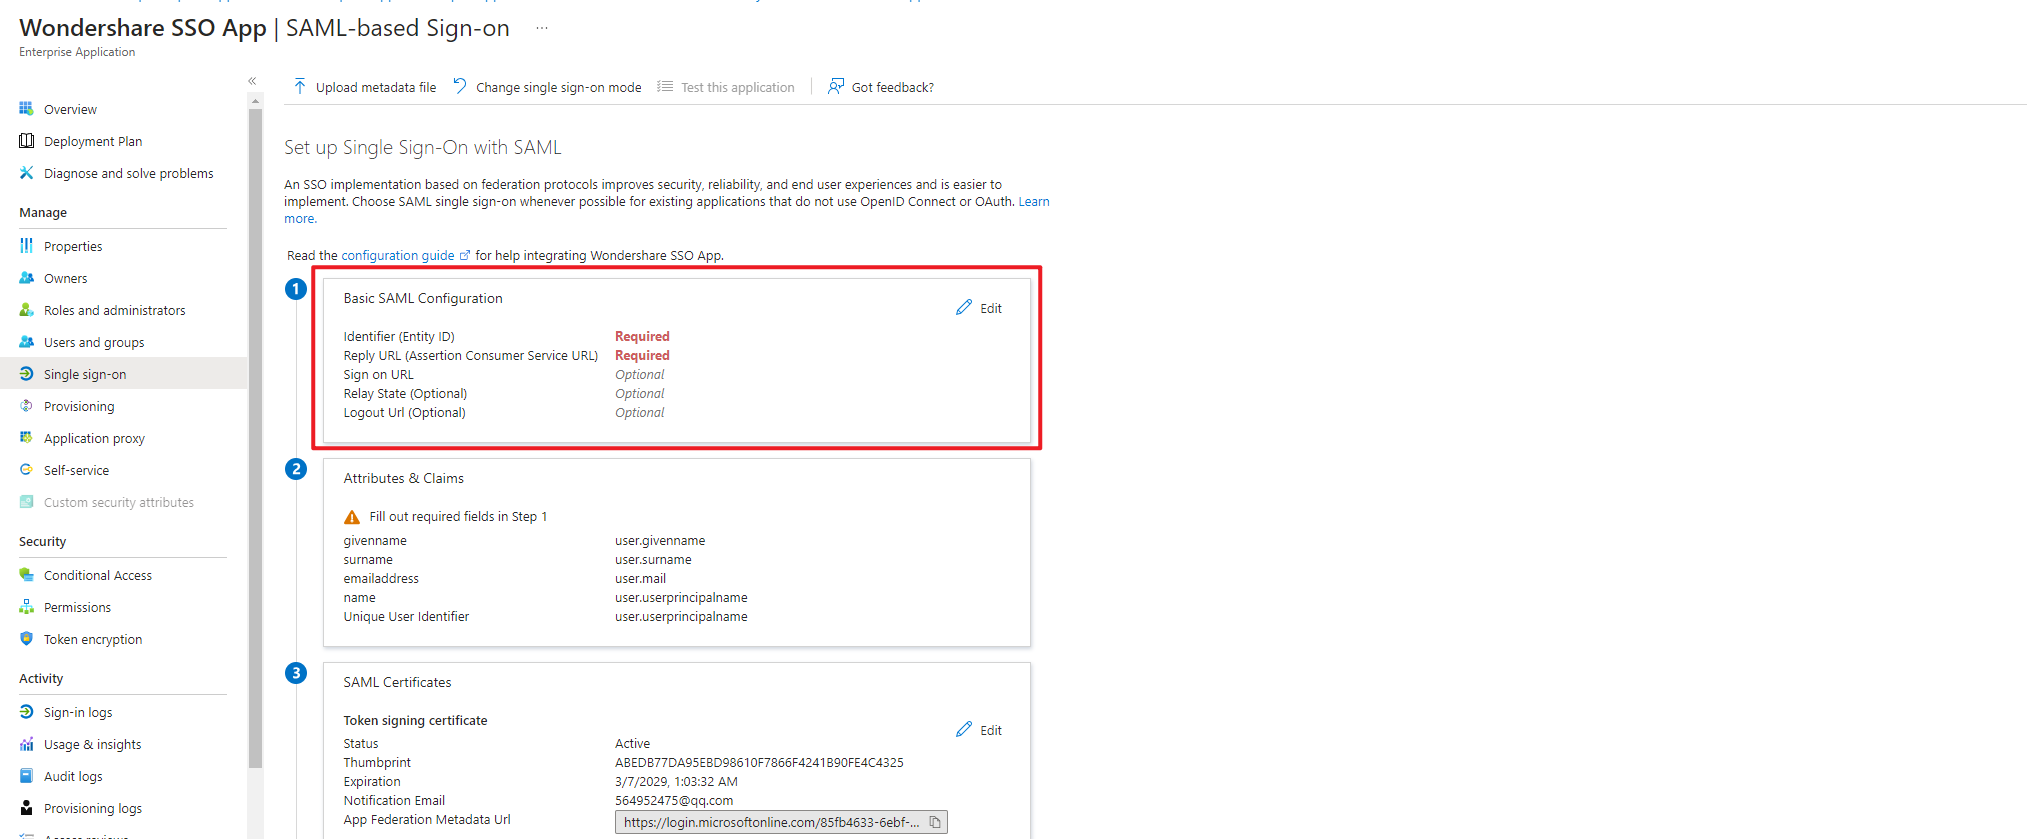
Enter Entity ID and Reply URL

Entity ID record to the EXCEL template in 1.3.6
Reply URL value is https://accounts.wondershare.com/api/v3/saml/callback/microsoft
Edit Attributes & Claims
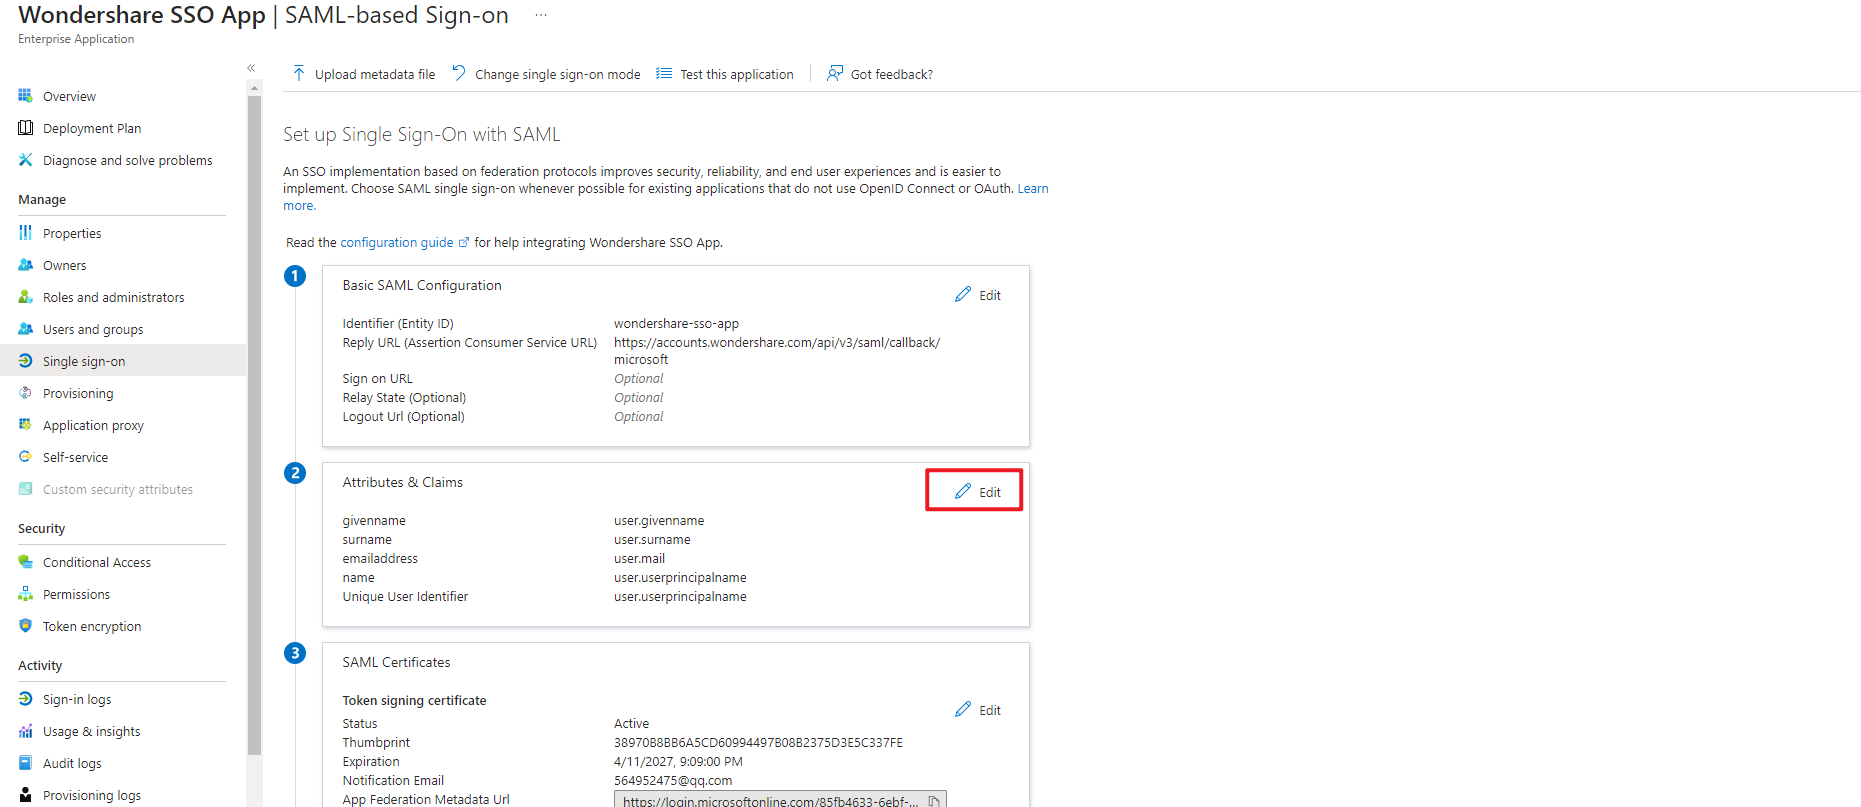
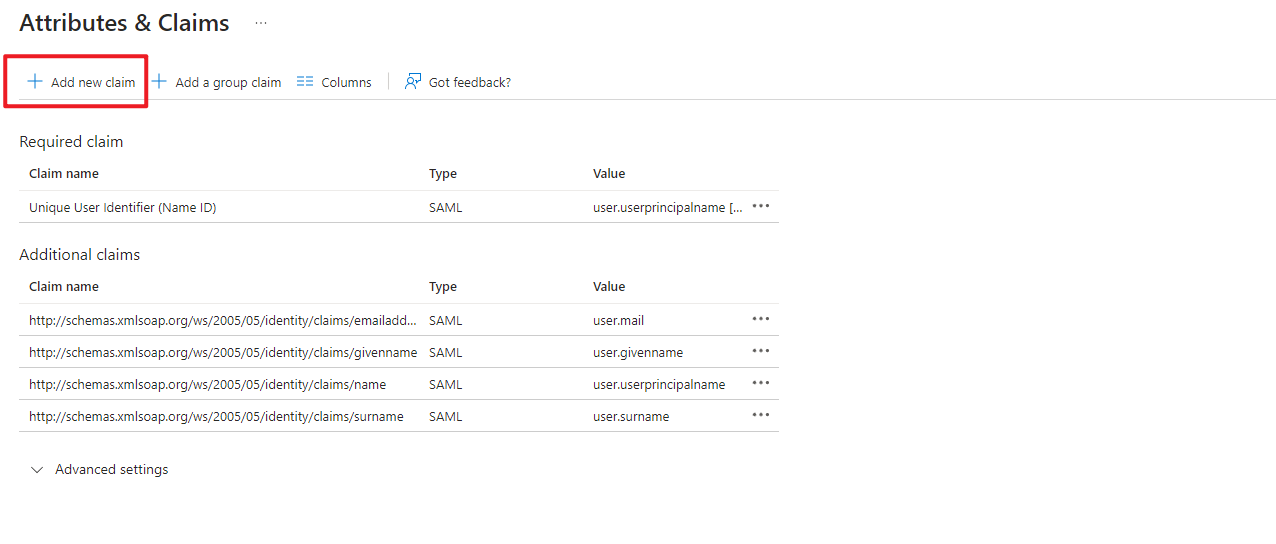
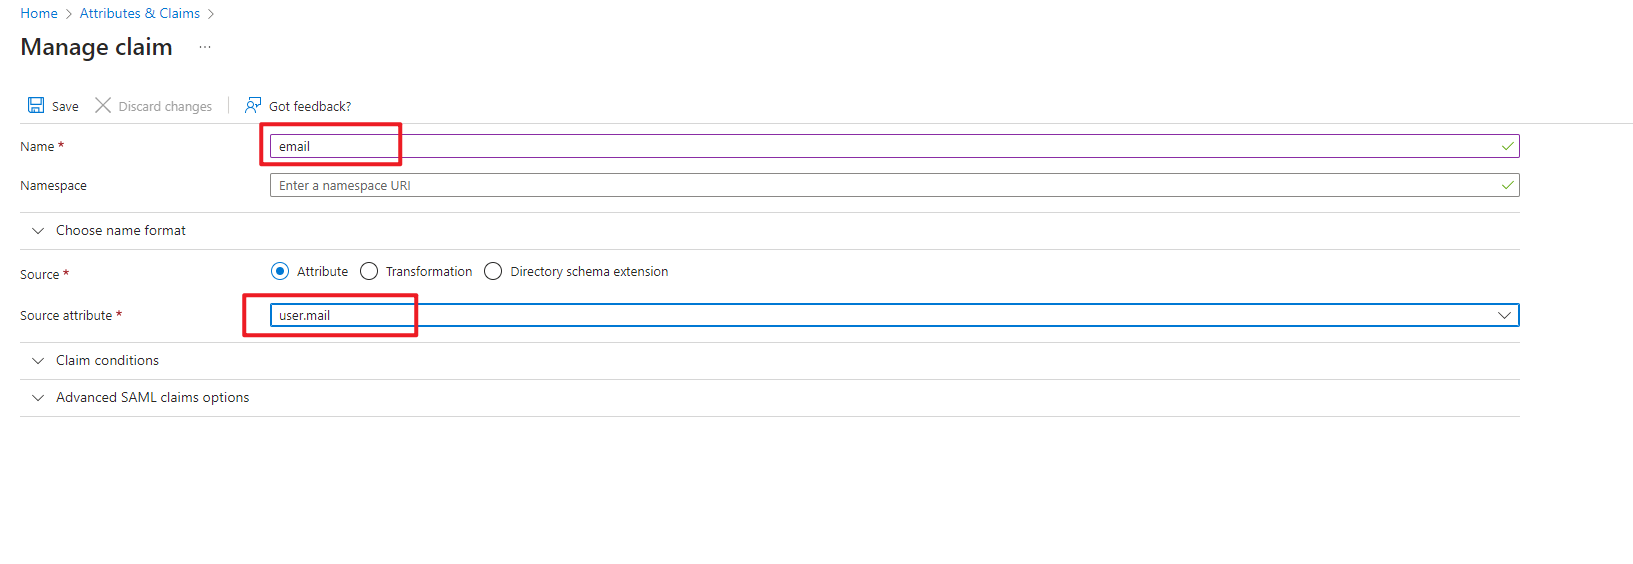
Name
email
Source
Attribute
Source attribute
user.mail
Configuration completed, result as follows:
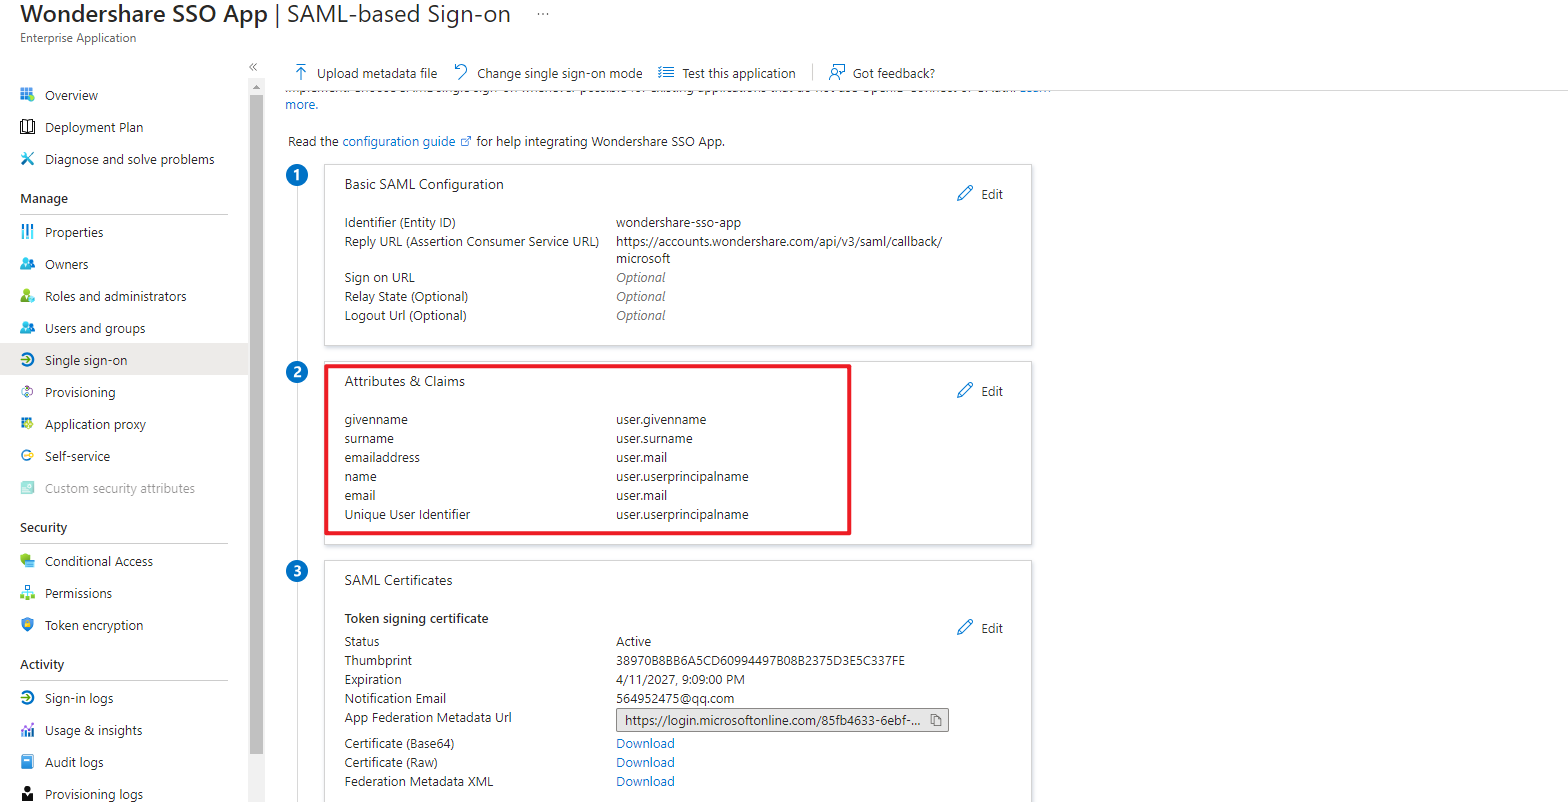
Download Certificate
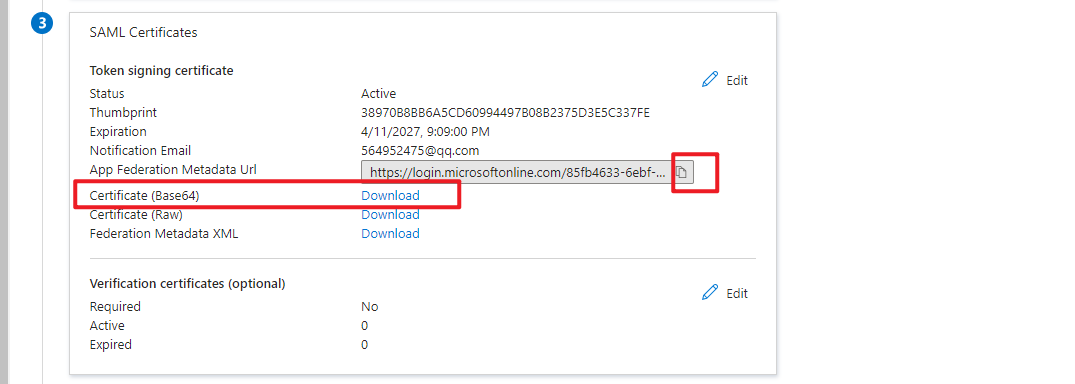
Copy App Federation Metadata Url to the EXCEL template in 1.3.6
Download Certificate (Base64) certificate and attach it to the EXCEL template in 1.3.6
Fill in SAML Information in Excel Template
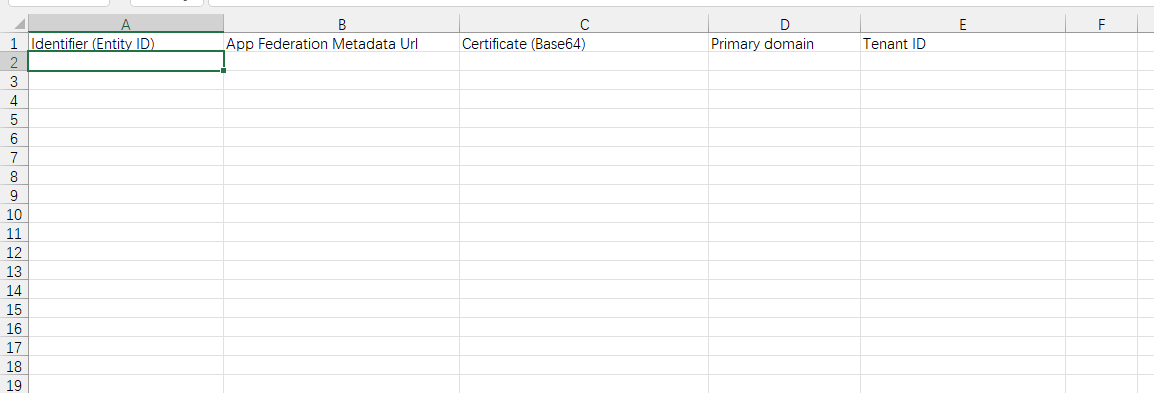
Identifier (Entity ID)
Entity ID entered in 1.3.3, refer to Entity ID❯
App Federation Metadata Url
Value of App Federation Metadata Url copied in 1.3.5, refer to App Federation Metadata Url❯
Certificate (Base64)
Certificate downloaded in 1.3.5 inserted into Excel, or provided as an attachment with Excel, refer to certificate❯
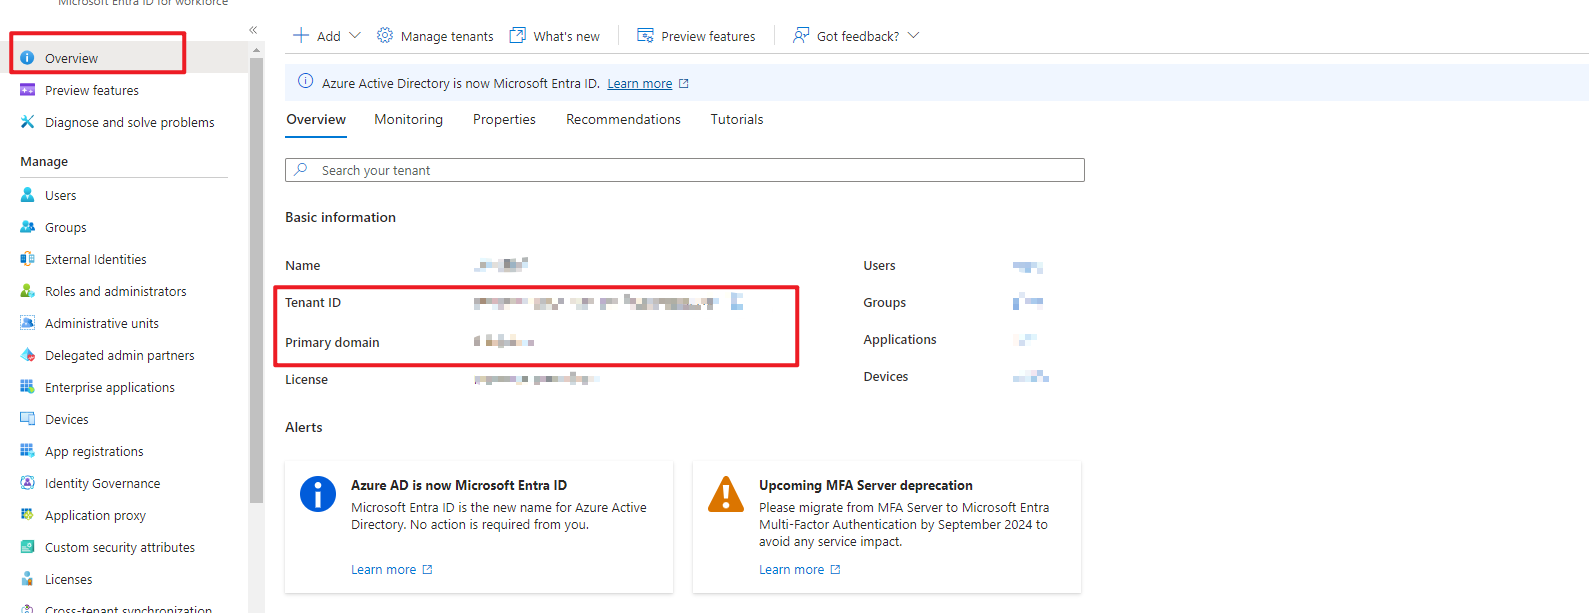
Primary domain
Primary domain on the overview page, enterprise domain
Tenant ID
Tenant ID on the overview page, enterprise tenant
After completing the EXCEL template, provide it to Wondershare.
FAQs
Microsoft Login AADST50105 Error
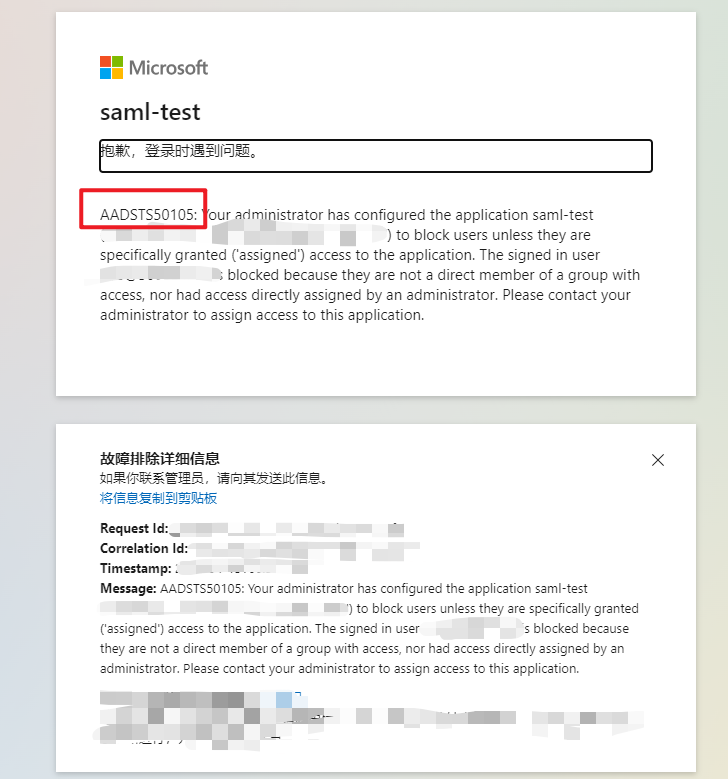
Solution:
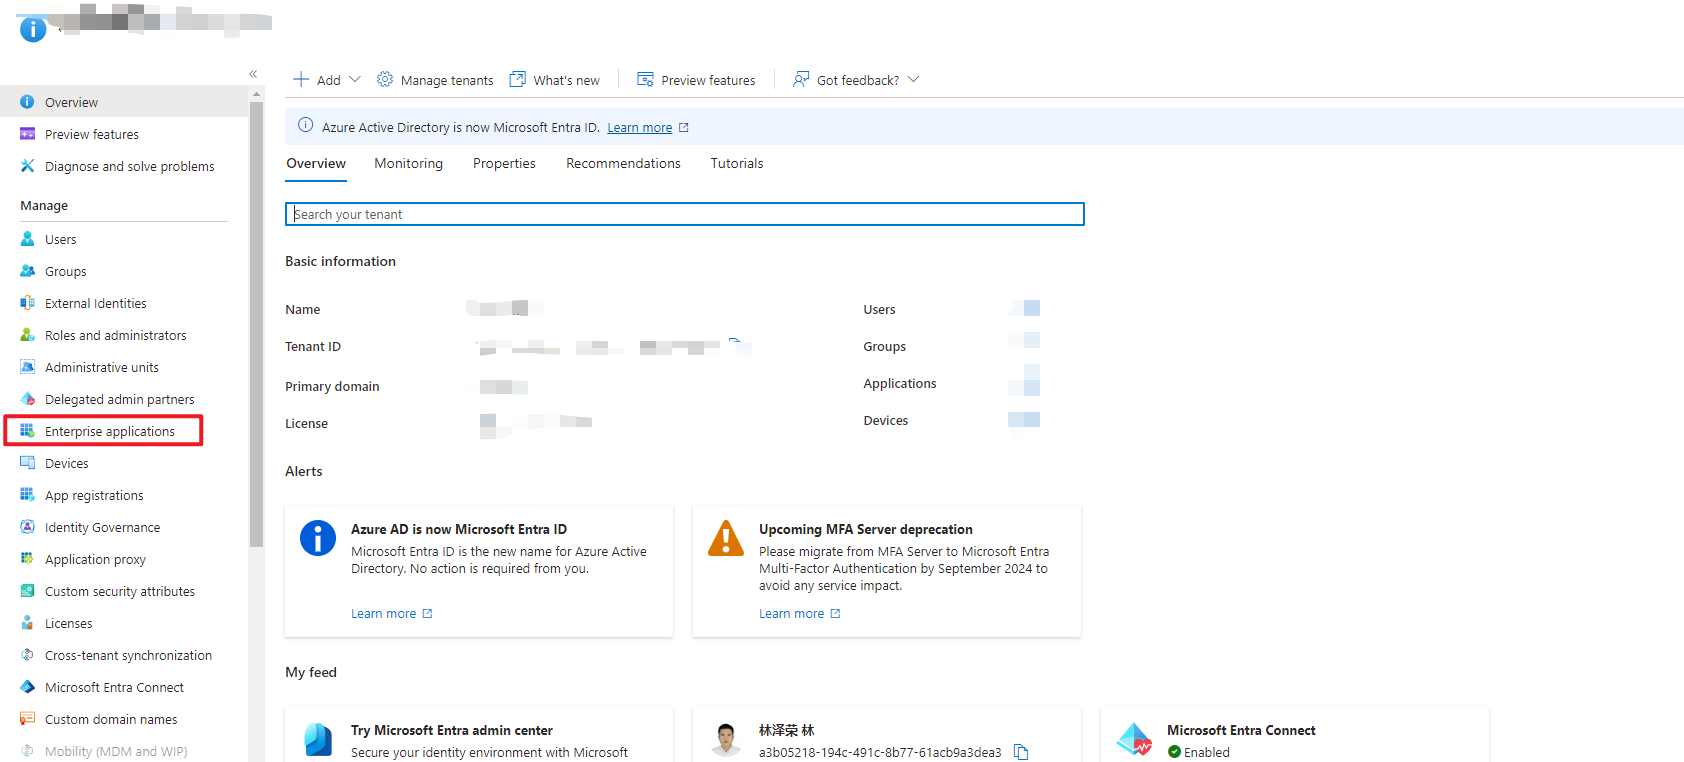
Select Enterprise applications in the Microsoft Admin Center.
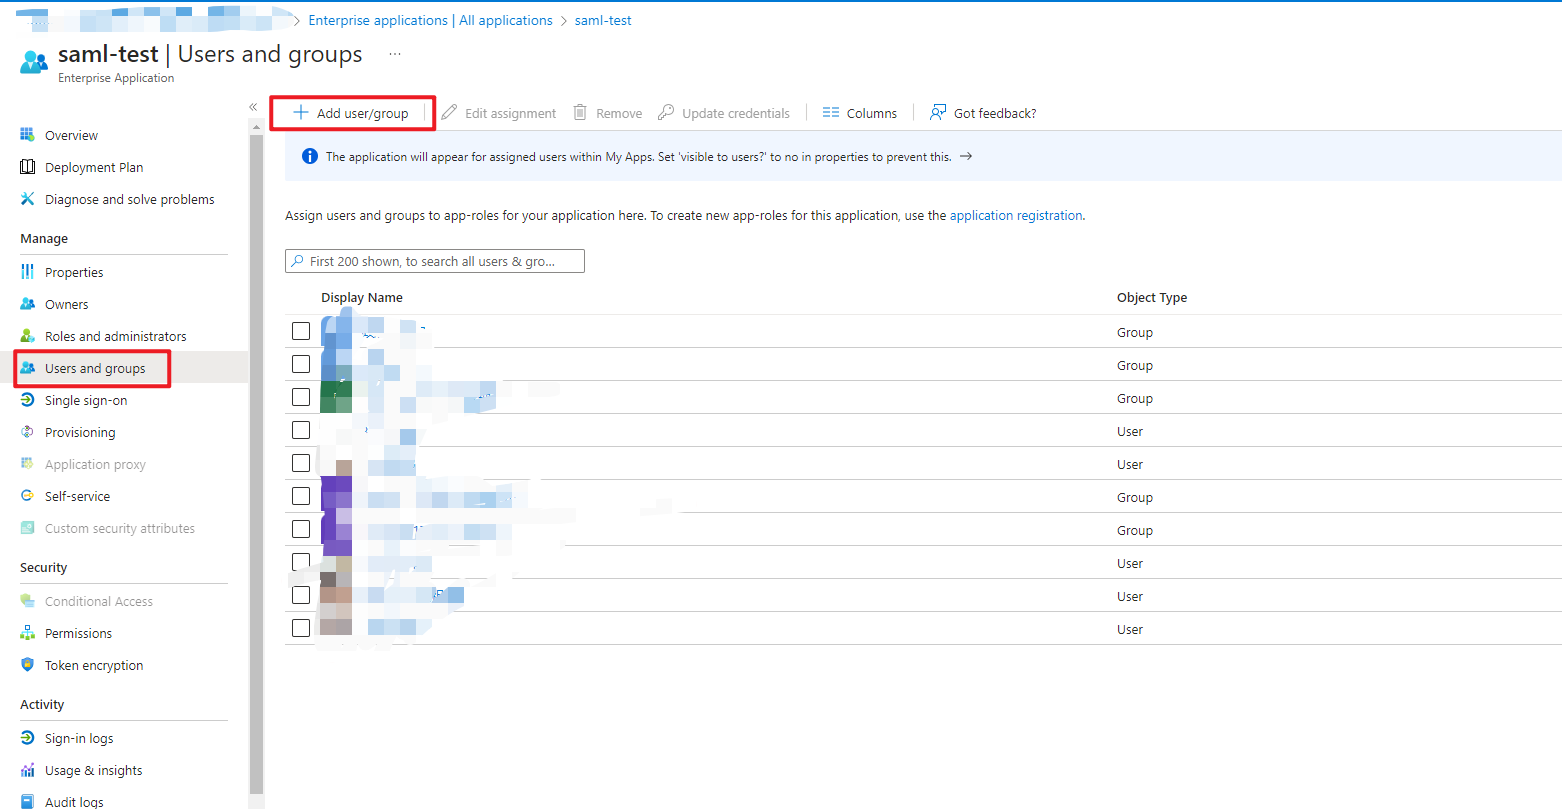
Find the application where you have configured wondershare SSO login.
Choose Users and groups, then click on Add user/group to add users or groups.
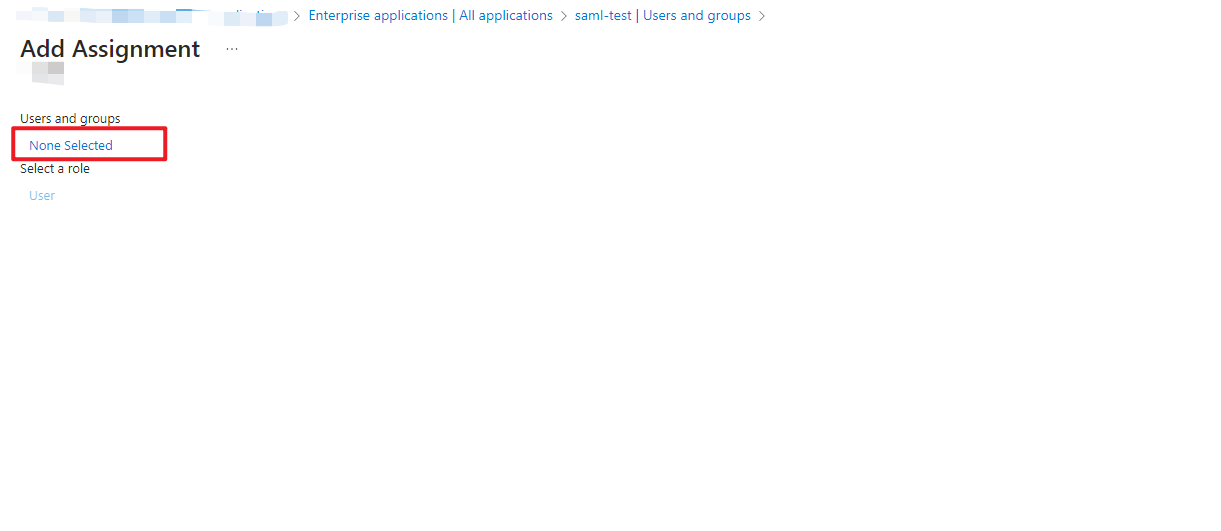
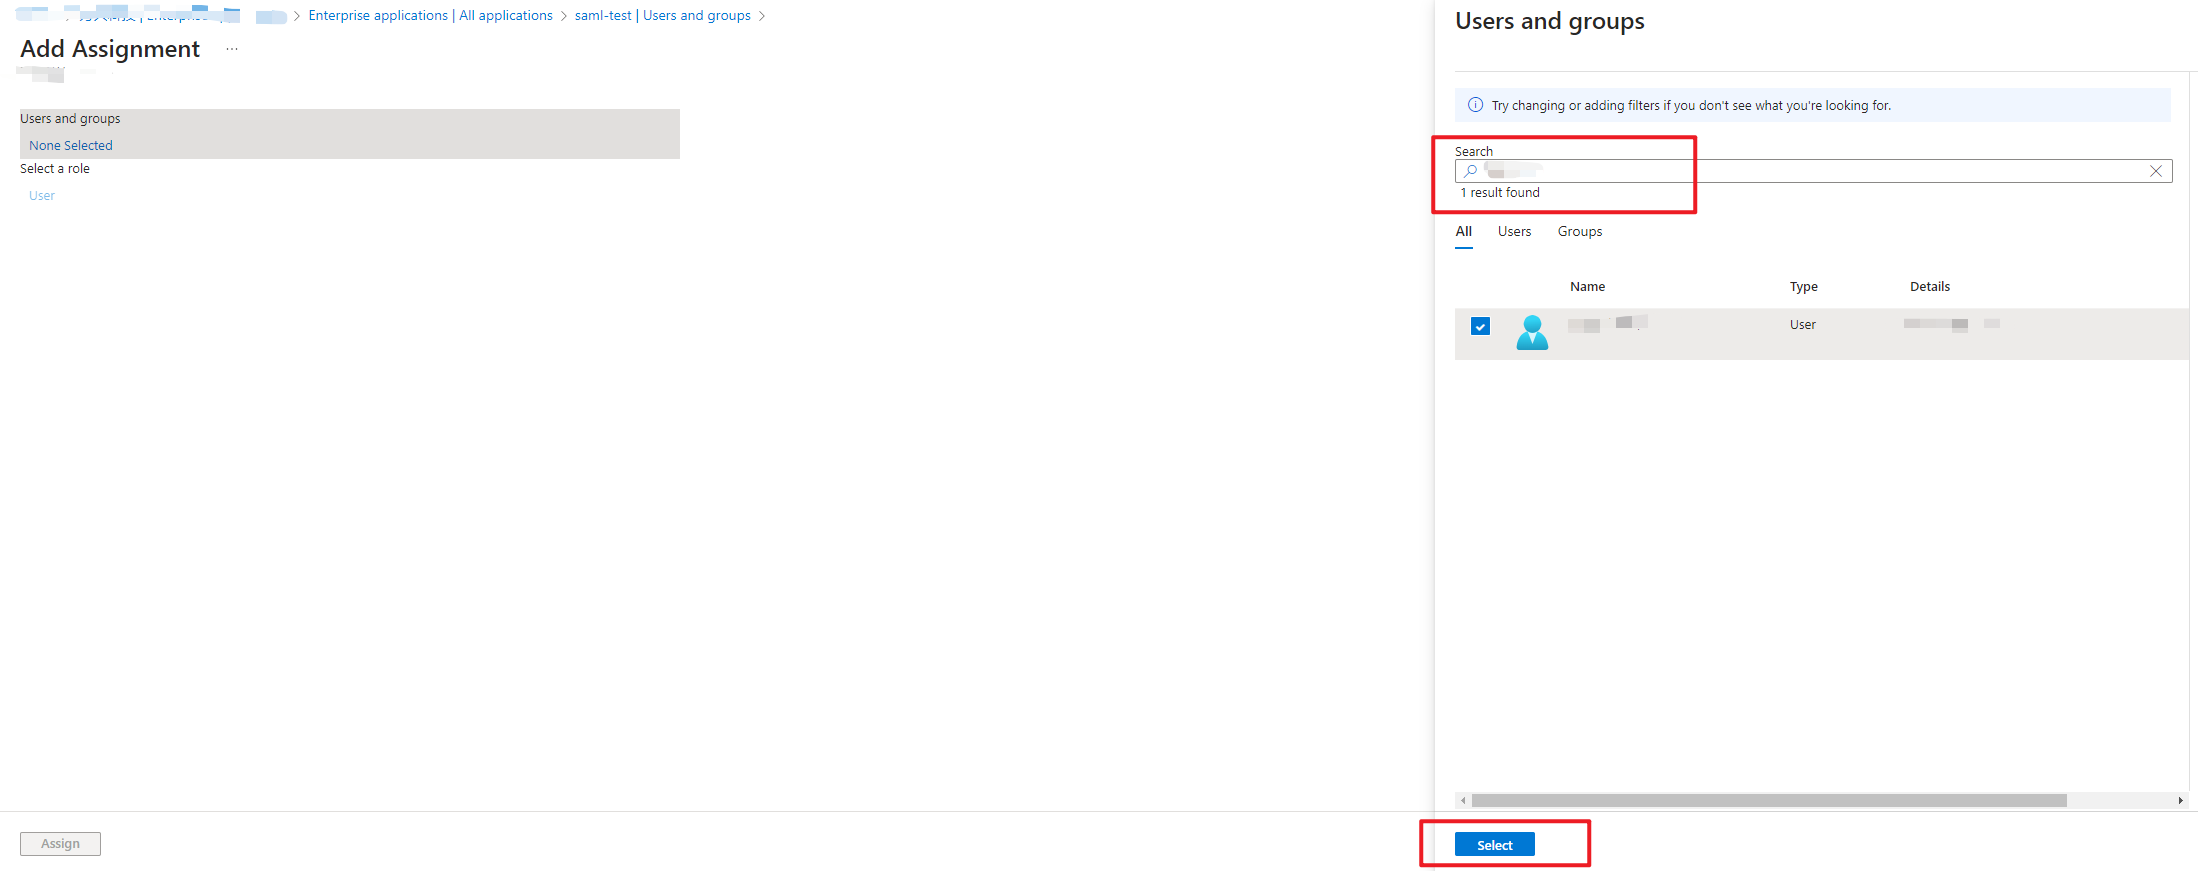
Click on None Selected to filter, then select to add.
